Table of Contents
ToggleThe Battle Bus isn’t just your ride into the map, it’s the first strategic decision in every Fortnite match. Whether you’re grinding for Victory Royales or competing in FNCS tournaments, understanding how this iconic blue transport works can give you a critical edge before you even touch the ground. In 2026, with Chapter 5 mechanics and evolving meta, the difference between a contested landing and a clean rotation often starts with when and where you bail from that familiar horn blast. This guide breaks down everything from flight path patterns to pro-level drop optimization, so you can stop guessing and start winning from the moment you hit “Ready.”
Key Takeaways
- The Battle Bus follows randomized flight paths (diagonal, edge-to-edge, or offset) that determine optimal drop timing and location strategy for every match.
- Drop timing significantly impacts early-game success: early drops (first 5 seconds) guarantee first loot access but limit location options, while mid-route timing (10-20 seconds) offers the best balance of flexibility and POI quality.
- Mastering the speed dive technique—angling 45 degrees downward while holding forward—minimizes air time and gives you a competitive edge in contested landing zones.
- Safe landing zones like Lonely Labs and Anvil Square provide guaranteed loot without immediate combat pressure, ideal for survival-focused players willing to accept longer rotations.
- In competitive tournaments, the Battle Bus drop phase is critical: teams that secure high-quality contested loot zones early gain massive mid-game advantages, making drop caller decisions and route analysis essential skills.
- Common mistakes like jumping too early, indecision paralysis, and ignoring contested drop signals cost players precious seconds that compound into disadvantages throughout the match.
What Is the Battle Bus in Fortnite?
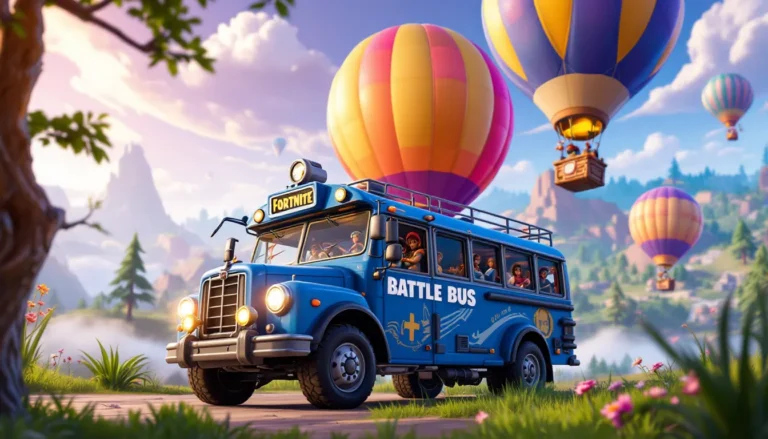
The Battle Bus is Fortnite’s signature deployment vehicle that carries all 100 players across the map at the start of every Battle Royale match. Suspended beneath a massive blue hot air balloon, this retrofitted school bus follows a randomized flight path across the island, allowing players to jump out at any point during its route.
Unlike spawn systems in other battle royales, the Battle Bus creates dynamic match starts. No two games have identical trajectories, forcing players to adapt their landing strategies based on the route. The bus moves at a consistent speed and altitude, with players able to deploy between the moment it enters the map boundary and when it exits on the opposite side.
The system serves multiple purposes: it randomizes early-game positioning, prevents spawn camping, and creates the frantic opening minutes where 30-40 eliminations often occur. The iconic horn that blares as the bus crosses the island boundary has become one of gaming’s most recognizable audio cues, signaling the start of another fight for survival.
The History and Evolution of the Battle Bus
Original Battle Bus Design and Concept
When Fortnite Battle Royale launched in September 2017, the Battle Bus arrived as a whimsical alternative to PUBG’s military cargo plane. Epic Games leaned into the game’s cartoonish aesthetic with a bright blue school bus dangling from a hot air balloon, a design that immediately set Fortnite’s tone apart from competitors.
The original concept came from Epic’s desire to make the deployment phase feel less tactical-military and more accessible. Internal design documents from 2017 show early prototypes featured various civilian vehicles before the team settled on the school bus for its universal recognition and nostalgic appeal.
The bus initially had minimal interior details and a simple external model. Players couldn’t see inside from third-person view, and the passenger animations were basic. The horn sound, now iconic, was added just weeks before launch when playtesters mentioned the crossing moment felt anticlimactic without audio feedback.
Major Battle Bus Changes Across Chapters
Chapter 1 kept the Battle Bus largely unchanged mechanically, though Epic introduced the first customization options in Season 7 with special event variants like the snowflake-themed winter bus.
Chapter 2 brought the first major visual overhaul in October 2019. The bus received higher-resolution textures, improved interior visibility, and dynamic lighting that changed based on time of day. Season 4’s Marvel collaboration temporarily replaced the balloon with a S.H.I.E.L.D. helicarrier, showing Epic’s willingness to experiment with the format.
Chapter 3 introduced Battle Bus customization as a persistent feature. Players could finally equip skins that changed the bus’s appearance for their entire lobby, a feature that had been requested since 2018. The Season OG nostalgia wave brought back the original Chapter 1 bus design as an equippable option.
Chapter 4 refined the flight path algorithm to better distribute players across new mobility options like reality rifts. The bus now accounts for named POIs added mid-season, adjusting potential routes to ensure all landmarks remain accessible.
Chapter 5 (current as of March 2026) features the most sophisticated Battle Bus AI yet. Routes now subtly adapt based on challenges and weekly quests, encouraging players to explore underutilized areas of the map while maintaining randomization for competitive integrity.
How the Battle Bus Works: Mechanics and Flight Path
Understanding Flight Path Patterns
The Battle Bus follows one of several predetermined trajectory types, though the exact route randomizes each match. Flight paths fall into three categories: diagonal (corner to opposite corner), edge-to-edge (side to side or top to bottom), and offset (entering and exiting at non-symmetrical points).
Diagonal routes are most common, appearing in roughly 45% of matches according to community tracking data from sites like Dexerto. These paths provide the widest coverage of central POIs, making mid-map locations like Mega City or Rumble Ruins accessible to most players.
Edge-to-edge trajectories occur about 35% of the time and tend to favor either northern/southern or eastern/western halves of the map. These routes create natural hot zones where the bus passes directly over tier-1 loot locations.
Offset paths are the rarest at 20% frequency but create the most interesting strategic decisions. When the bus enters at an angle that doesn’t cover popular drop spots like Sanguine Suites or Fencing Fields, these locations become safer options for players willing to glide farther.
The game calculates the route during the pre-game lobby countdown, which is why you’ll occasionally see slight delays before the “Battle Bus approaching” notification. Server-side validation ensures the path meets minimum coverage requirements, no route can exclude more than 30% of named locations from reasonable gliding distance.
Battle Bus Speed and Timing
The Battle Bus maintains a constant velocity of 88 units per second in Fortnite’s coordinate system, which translates to roughly 20 meters per second in real-world scale. This speed hasn’t changed since Chapter 1, providing consistency for players calculating drop timing.
From map entry to exit, the bus takes between 35 to 50 seconds to complete its route depending on trajectory length. Diagonal corner-to-corner paths run longest, while shorter edge routes can complete in under 40 seconds.
Players can exit the bus from the moment it crosses the map boundary until it exits. The “thanking the bus driver” emote window closes five seconds before exit, which has become a community benchmark for late drops.
The bus flies at a fixed altitude of 300 meters above sea level. This height is calibrated to give players approximately 25-30 seconds of gliding time if they deploy immediately versus 12-15 seconds if they wait for glider auto-deploy. Understanding this timing differential is crucial for competitive rotations, as emphasized in guides on mastering early-game movement.
Strategic Drop Timing: When to Jump from the Battle Bus
Early Drop vs. Late Drop Strategies
Early dropping, jumping within the first 5 seconds of the route, gives you first access to loot at locations near the bus’s entry point. This approach is mandatory for aggressive players targeting high-traffic POIs, since landing even 2-3 seconds after opponents means contested chest spawns and immediate 50/50 pickaxe fights.
The main advantage: you’re guaranteed to be among the first on the ground at your chosen spot. The drawback: if the bus enters on the map’s edge, early dropping severely limits your location options. You might get clean loot, but at a periphery landmark that forces long rotations later.
Late dropping, waiting 20+ seconds before exiting, opens up the entire trailing half of the bus route. This strategy works for players who prefer safer landings with guaranteed loot and fewer immediate engagements. It’s particularly effective when the bus path covers a high-value end-route location that would be unreachable from an early jump.
Late drops sacrifice early positioning for better POI selection. In competitive formats, teams often late drop to specific zones where they’ve established dominance through practice, accepting that they’ll spend more time in the air.
Mid-route timing (10-20 seconds) offers the best balance for most players. You maintain flexibility while accessing the route’s center section, which typically includes 3-4 tier-1 named locations. This timing also lets you observe where early droppers committed, allowing last-second pivots to less contested alternatives.
Calculating Distance and Glider Deploy Height
Your glider auto-deploys at 30 meters above ground level, creating a hard floor for how aggressively you can dive. The key to optimal drops is maximizing dive time while minimizing post-deployment glide distance.
When jumping directly beneath the Battle Bus path, you can dive straight down and reach the ground in roughly 12 seconds. When targeting a location perpendicular to the route, you’ll need to account for horizontal travel distance versus vertical descent rate.
Fortnite’s dive speed caps at approximately 60 units per second when angled downward at 45 degrees, the optimal dive trajectory. Going completely horizontal cuts your speed dramatically, while going straight down means you’re not covering lateral distance efficiently.
The community-developed rule of thumb: for every 100 meters of horizontal distance from the bus path, add 5-6 seconds to your landing time compared to a straight drop. This means a POI 400 meters perpendicular to the route will take 20-24 seconds longer to reach than a spot directly below.
Smart players use the minimap’s grid squares as measurement tools. Each large square represents 250 meters, so you can quickly estimate whether a desired landing is feasible before jumping. The competitive scene has refined these calculations into muscle memory through thousands of repetitions.
Best Landing Spots Based on Battle Bus Route
Hot Drop Locations for Aggressive Players
When the bus route passes directly over Mega City, expect 15-20 players to drop immediately. The high-rise structure provides vertical loot distribution and immediate combat opportunities. Jump as soon as the bus is within 300 meters, dive at maximum speed, and aim for rooftop chest spawns to get armed before ground-level players.
Sanguine Suites is another magnet for aggressive drops when accessible. The central mansion typically draws 8-12 players, creating guaranteed early-game action. Land on the second-floor balcony for the most reliable weapon spawn, then push interior rooms while opponents are still looting.
Rumble Ruins attracts skilled players due to its dense loot pool and natural cover. When the bus crosses within one grid square, expect a contested landing with 10-15 players. The underground vault section gives an advantage to players who know the layout, land near the stairwell entrance and rush the vault before others navigate the maze.
These hot drops share common traits: high chest spawn density (10+ potential chests), central map positioning for zone RNG, and vertical elements that reward fast decision-making. They’re ideal for warming up in pubs or grinding elimination challenges.
Safe Landing Zones for Survival-Focused Gameplay
Lonely Labs on the southern edge rarely draws more than 3-4 players unless the bus passes directly overhead. When approaching from an angle, it becomes one of the safest drops with sufficient loot for a full loadout. The landmark includes 7 chest spawns and reliable shield mushrooms nearby.
Frosty Fortress in the northwest quadrant sees minimal traffic in most pub matches. It’s far enough from bus routes that only dedicated rotators land there. You’ll find 6 chest spawns and harvesting materials without immediate combat pressure. The downside: long rotations if zone pulls southeast, especially in competitive tournament formats where storm damage ramps faster.
Anvil Square offers moderate loot (8 chest spawns) with surprisingly low contest rates. Most aggressive players skip it for flashier POIs, making it perfect for passive early games. The landmark’s central-west position also provides decent zone RNG compared to corner locations.
Safe spots prioritize guaranteed loot over kill potential. You’re trading early-game action for a smoother mid-game with full shields and weapons. These locations particularly suit Zero Build modes where immediate loadout quality matters more than getting quick eliminations.
Adapting Your Drop to Battle Bus Trajectory
A bus route crossing the northern edge fundamentally changes the meta. Suddenly, locations like Steamy Stacks and Brutal Bastion become early-drop options while southern POIs like Knotty Nets require late-drop commitment.
The adaptable player mentally divides the map into thirds based on the bus path: accessible early, accessible mid-route, and accessible late. Within 3 seconds of seeing the trajectory, you should identify which tier-1 location in your preferred playstyle (hot/safe) falls into the optimal timing window.
Example decision tree: Bus enters from northwest corner heading southeast. Early drop gives you Brutal Bastion or Rebel’s Roost. Mid-route accesses Mega City or Rumble Ruins. Late drop opens Sanguine Suites or Frosty Fortress at the exit end.
Pro players prepare drop plans for multiple scenarios. They have primary, secondary, and tertiary options based on the route, then make final decisions based on where they see opponent trails heading. This flexibility separates consistent performers from players who stubbornly drop the same spot regardless of route efficiency.
Weekly challenge rotations also influence optimal drops. When quests require visiting specific landmarks, those locations see temporary population spikes. A bus path covering three challenge locations simultaneously might push savvy players toward off-meta alternatives that offer cleaner loot.
Battle Bus Skins and Customization Options
Most Popular Battle Bus Skins Through the Years
The Default Bus remains the most commonly seen variant simply because it’s free and nostalgic. But among unlockable options, several skins have achieved iconic status.
Birthday Cake Bus (August 2018) celebrated Fortnite’s first anniversary with a festive multi-tier cake design. It remains a flex among veteran players who’ve stuck around since Year 1, though you’ll spot it less frequently than you might expect.
Mecha Team Leader Bus (Season X) transformed the vehicle into a matching skin for the mech, complete with glowing blue accents and mechanical details. This variant surged in popularity when anime collaborations brought a new wave of players who appreciated the mecha aesthetic.
Winterfest Cozy Bus (December 2021) wrapped the bus in string lights, stockings, and snow frosting. It returns to heavy rotation every holiday season, making December lobbies feel like a festive convoy.
Graffiti Bus (Chapter 3, Season 3) let players add custom decals similar to weapon wraps. This customization depth made it instantly popular even though requiring Battle Pass tier 75 to unlock. The ability to match your bus to your skin’s aesthetic created hundreds of unique combinations.
Anime Express Bus from the recent My Hero Academia collab features manga-style speed lines and character iconography. Since releasing in January 2026, it’s dominated lobbies, particularly in Asian servers where anime IP drives significant engagement.
How to Unlock and Equip Battle Bus Skins
Battle Bus skins come from three primary sources: Battle Pass rewards, Item Shop purchases, and special event completions.
Battle Pass skins typically appear around tier 40-75 as mid-tier rewards. Chapter 5, Season 2’s current pass includes the Neon Streets Bus at tier 60, which adds cyberpunk underglow and holographic advertisements. To unlock it, you’ll need to complete enough weekly and daily challenges to accumulate 60 levels worth of XP.
Item Shop rotations bring back legacy bus skins for V-Bucks, usually priced at 500-800 V-Bucks depending on rarity and detail. Epic tends to re-release seasonal buses annually (Winterfest bus in December, Summer bus in July) alongside themed content.
Special events like Fortnitemares or Collision live events sometimes award unique buses for participation. The Cube Queen Bus from the Chapter 2 finale rewarded players who logged in during the event window, creating a time-limited exclusive that drives FOMO.
To equip a bus skin, navigate to the Locker tab, scroll to the Battle Bus category (added in Chapter 3), and select your preferred option. The skin applies to every match you play, visible to all 99 other players during the drop phase. Your selection also appears in pre-game lobby flyovers.
One quirk: in competitive tournaments and Arena modes, Epic sometimes defaults everyone to the standard bus to reduce visual noise and maintain competitive parity. This policy varies by event and region, so don’t be surprised if your equipped skin doesn’t show up in FNCS qualifiers.
Pro Tips for Optimizing Your Battle Bus Drop
Minimizing Travel Time in the Air
The fastest drop technique is the speed dive: jump from the bus, immediately angle your character 45 degrees downward toward your target, and hold forward. This trajectory maximizes the combination of vertical descent and horizontal travel.
Avoiding common mistakes significantly impacts landing speed. Never go completely vertical unless dropping directly beneath the bus, you’re wasting potential forward momentum. Never glide horizontally for extended periods early in your descent, you’re traveling at half the speed of a proper dive.
The redeploy timing matters more than most players realize. Your glider automatically opens at 30 meters, but you can manually deploy it earlier by pressing the jump button again. Advanced players sometimes manually deploy 10-15 meters early when approaching buildings, sacrificing 1-2 seconds of speed to land precisely on a rooftop rather than overshooting.
Audio cues help optimize drops even without visual confirmation. The sound of the glider deploying for nearby enemies tells you whether you’re ahead or behind in the race. If you hear multiple deployments before yours, consider pivoting to a backup chest spawn within the same POI.
Weather effects in Chapter 5 now influence glide speed. Windstorms can push you up to 15% faster or slower depending on direction, while lightning storms don’t affect speed but reduce visibility. Checking the weather system during the lobby countdown helps you anticipate these modifiers.
Common Battle Bus Mistakes to Avoid
Jumping too early when targeting a POI near the bus entry is the most frequent mistake. Players see their destination icon and immediately bail, not realizing they’d land faster by waiting 3-4 more seconds until the bus is closer. Use the distance markers on the minimap, if your target is more than one full grid square away, you’re probably jumping prematurely.
Indecision paralysis kills momentum. Players who hover at the bus door for 5+ seconds watching where opponents drop often end up with the worst of both worlds: late to their intended spot and without alternative intel. Commit to a drop plan within 2 seconds or switch to your backup immediately.
Ignoring contested drop signals dooms survival-focused players. When you see 8-10 player trails converging on your intended POI, and you’re not playing for early kills, it’s time to pivot. The 3 seconds you spend changing targets mid-air saves the 30 seconds you’d spend spectating after losing a pickaxe fight.
Over-rotating for loot is an advanced mistake. Players sometimes glide an extra 200 meters to reach a “better” POI when they’ve already passed a perfectly viable location. This adds significant air time and can leave you outside the first zone if RNG pulls away. The marginal loot improvement rarely justifies the positional disadvantage.
Forgetting to mark your landing for teammates in duos, trios, or squads creates coordination chaos. Use the ping system while still in the air to confirm where you’re heading. This prevents multiple teammates from landing on the same building or spreading too far to support each other when third parties arrive.
The Battle Bus in Competitive and Tournament Play
In FNCS and Cash Cup tournaments, the Battle Bus takes on strategic dimensions that don’t exist in public matches. Pro teams analyze previous tournament flight paths to identify statistical probabilities for specific routes, then develop drop plans for each scenario.
The competitive meta heavily favors contested drops at tier-1 POIs. Unlike pubs where you can pivot to safer options, tournament points require you to secure high-quality loot zones even through fighting. Teams that consistently win their landing spot fight earn massive advantages through the mid-game.
The surge mechanic in late-game competitive circles makes early-game efficiency critical. Teams that spend 90 seconds gliding to a safe spot start behind on materials and positioning compared to teams that landed quickly in their claimed territory. This time pressure explains why pro players obsess over optimizing every second of the drop.
Bus routes that favor your team’s POI are called “blessed” paths in pro terminology. When the bus passes directly over your claimed spot, you can drop instantly and guarantee first access. Paths that require extended gliding to reach your zone are “griefed” routes where opponents landing elsewhere get time advantages.
Most Championship Series teams designate a drop caller, usually the IGL, who makes the final drop timing decision based on real-time assessment of opponent movements. This person watches for enemy team trails and makes split-second calls to either commit early or wait for cleaner positioning.
The Pit creative maps help teams practice drop timing and early-game fights, but they can’t fully replicate the Battle Bus decision tree. That’s why pro teams run hours of tournament practice in Arena modes, specifically to master the drop phase under competitive conditions.
Recent rule changes for invitational tournaments sometimes include fixed bus routes announced before matches begin. This removes RNG from drop strategy but intensifies the contested landing meta, since every team knows exactly where opponents will drop. The results are bloodbath opening minutes with 40+ eliminations before the first zone closes.
Battle Bus Easter Eggs and Fun Facts
The Battle Bus horn plays in the key of B-flat, matching Fortnite’s main menu music theme. Sound designers intentionally tuned it to be recognizable but not grating, since players hear it hundreds of times.
During the Chapter 1, Season 4 meteor event, the Battle Bus briefly had a cracked windshield and dented front bumper, suggesting it had survived debris strikes. Most players never noticed this detail that persisted for three weeks.
The “Thank the Bus Driver” emote was added after a community meme in Season 5 went viral. Epic implemented it within two weeks of the trend peaking, one of the fastest community idea-to-implementation turnarounds in Fortnite history. Over 2 billion bus driver thanks have been registered since the feature launched.
In Save the World mode, you can find abandoned Battle Buses throughout the map as environmental props, some converted into makeshift survivor shelters. This cross-mode continuity suggests the bus exists as actual in-universe technology rather than just a gameplay abstraction.
The balloon holding the bus has hidden manufacturer markings reading “Durrr Burger Flight Systems” if you examine it closely in replay mode. This connects the bus to Fortnite’s fast-food lore and the Durrr Burger corporation.
During the Beach Bomber summer event, the bus briefly sprouted inflatable pool floaties and left a trail of water droplets. This variant wasn’t officially classified as a skin and only appeared for 48 hours, making it one of the rarest bus variations ever.
The Battle Bus appears in Fortnite Creative mode as a spawnable device, but it doesn’t actually fly, it’s a static prop. Creative mode mappers have worked around this by using hidden teleporters to simulate bus drops in custom game modes.
Statistically, the bus routes that enter from the northeast corner and exit southwest are approximately 8% more common than the reverse trajectory, according to five years of community tracking data. Epic has never commented on whether this asymmetry is intentional or a quirk of the RNG algorithm.
Pro player Bugha revealed in a 2024 interview that he keeps a spreadsheet of bus routes from his tournament matches to identify patterns, though he admitted he’s never found exploitable RNG. The spreadsheet has over 1,200 logged routes.
The bus received temporary thematic modifications for nearly every major collaboration: Marvel’s Avengers quinjet style, Star Wars troop transport design, and even a limited party bus variant with disco lights for the Fortnite birthday events. Some of these were only visible during specific LTM modes.
Conclusion
The Battle Bus might seem like a simple delivery mechanism, but it’s the first battleground of every match. Mastering when to jump, how to dive efficiently, and which POIs to target based on route trajectories separates players who scramble for scraps from those who hit the ground with intent. Whether you’re an aggressive fragger racing 15 opponents to Mega City’s rooftops or a calculated survivor gliding to an off-angle spot for clean loot, these decisions compound throughout the match.
Chapter 5 has made the drop phase more dynamic than ever with adaptive routes and weather modifiers, so staying sharp on fundamentals while adapting to variables is key. Load into Creative, practice your dive angles, study the map grid, and build the muscle memory that turns flight path analysis into instinct. The horn’s about to blow, make that first jump count.